Northpoint
NT9HP
Documentation Project
CBTricks.com
Northpoint NT9HP Frequency Conversion Instructions:
|
1.
|
Check out the radio for proper operation before starting. |
|
2.
|
Remove Power from the radio |
|
3.
|
Remove the bottom cover. (speaker side) |
|
4.
|
With radio open, knobs
facing you, locate the frequency board in lower left section of chassis. |
|
5.
|
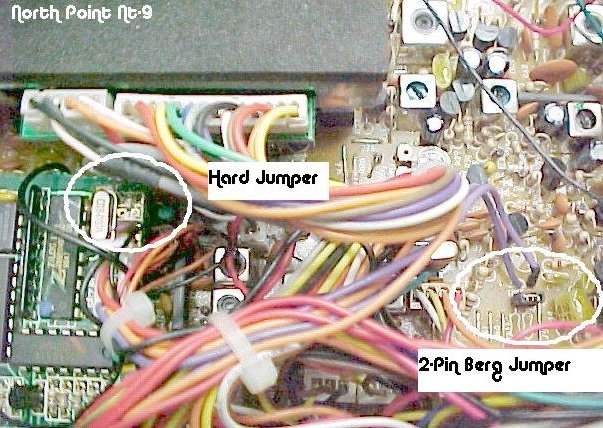
Locate the two-pin jumper, toward the front center of the radio next to J55. Move the jumper from the single pin & place over both pins. This completes the frequency conversion. |
|
6.
|
Apply Power
and check out the radio for proper operation and do or check alignment if
necessary. You now have a choice of 8 bands. You now have a choice of 8 bands. To select band, Move BRT/DIM switch to the DIM position. Select N5, or band 5, there are 8 bands. Move the BRT/DIM switch back to brt. This selects the "CB" band CH. 1 - CH. 40. |
|
7.
|
Replace cover. |
| Peak
& Tune Connect radio to power meter & dummy load. Turn the RF power control on the front of the radio to low power. Adjust VR-16 to 3 watts. Turn power control on front of radio to high. Adjust VR-13 to 15 watts dead key. Adjust VR12 for low power modulation of 120%, and VR-14 for high power modulation of 120%. |
|
Disclaimer: Although the greatest care has been taken while compiling these documents,
we cannot guarantee that the instructions will work on every radio presented.